Dedicated cavities help teams identify missing items quickly.
Application / Instruments
Precision Tool &
Instrument Cases
Custom foam layouts for inspection tools, calibration equipment and field-service kits, with each item positioned for safe handling.
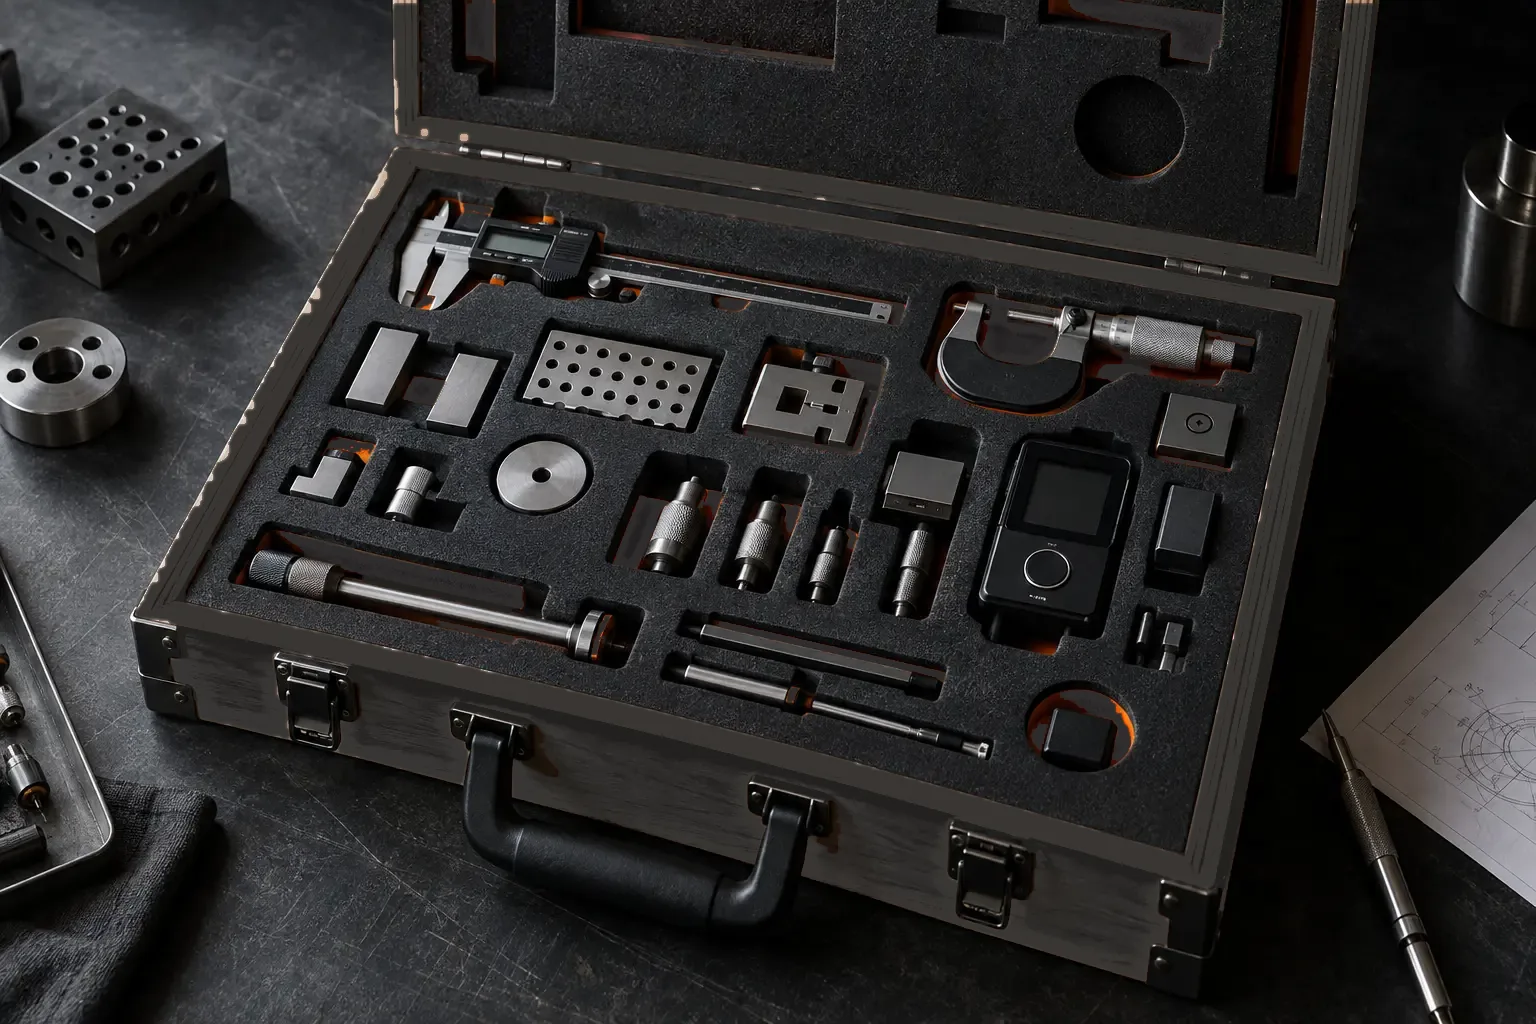
DESIGN PRIORITIES
A layout built around the complete kit.
Removal points designed around real item shape and handling.
Accessories can be separated across trays or removable layers.
Foam type and contact points selected for the equipment finish.
CONFIGURATION QUESTIONS
Make every position intentional.
Precision instruments often combine delicate measuring devices with cables, adapters, standards and tools. The interior should protect the equipment while making missing items and incorrect packing easy to notice.
Identify lenses, probes, connectors, displays, adjustment points and calibrated surfaces that must not carry pressure from the foam or neighboring items.
Finger access, pull tabs and layered cavities are planned around how each item is lifted. Replaceable sections can be discussed for parts that change over time.
Defined accessory positions support visual checks before leaving the workshop and again after field use, reducing loose parts and inconsistent repacking.
COMMON QUESTIONS
Send the complete kit.
Can you design from photographs only?
Photographs and rough dimensions are enough to start a discussion. Final machining normally requires reliable equipment dimensions, drawings, scans, a physical sample or another approved dimensional reference.
Which foam is best for precision instruments?
There is no single best material. EVA, PE/XPE and PU have different firmness, appearance and cushioning behavior. The selection depends on mass, fragility, contact surface and available cushioning distance.
Useful RFQ information
-
01
Equipment outline
CAD, drawing, scan, photo with dimensions or physical sample.
-
02
Handling frequency
Occasional storage or daily field use.
-
03
Kit organization
Priority items, accessories, documents and spare capacity.
TYPICAL SPECIFICATION
What a precision instrument case usually needs.
Cavities machined from the manufacturer's dimensions rather than scaled from a photograph. For instruments with tight tolerances, the photo route is the wrong route.
A soft surface on the cavity walls where the instrument is lifted in and out daily and the foam must not mark a finished surface.
Each instrument in its own cavity. Shared cavities let items touch, and contact between calibrated parts is how calibration is lost.
Routed reliefs so the instrument is gripped by its housing and not by a shaft or a measuring face.
One defined position per item, so a missing tool is visible the moment the case is opened.
COMMON MISTAKES
What goes wrong in a precision enquiry.
If an instrument cannot be inverted, jarred, or transported on its side, that changes the layout completely. Say it at enquiry stage.
Layers look efficient on paper and are the first thing to fail when the case is opened by someone who did not pack it.
Corrosion during a sea crossing damages more instruments than impact does. Closed-cell material and vapour control are the answer.
The insert is built to the internal dimensions of the case you will use. Send both.
EVA, PE, XPE and PU behave differently under load and against finished surfaces. The grade is a specification, not a commodity.
PRICE DRIVERS
What changes the cost of a precision case.
Cavities machined from a drawing cost more than cavities scaled from a photograph, and are the only route for tight tolerances.
An additional process step that protects finished instrument surfaces over repeated handling.
One cradle per instrument is the protection standard. Shared cavities reduce cost and reduce protection.
Routed reliefs so the instrument is gripped by its housing rather than a measuring face.
XPE and PU cost more than standard PE. Where the instrument is sensitive to shock or to surface marking, that difference is the point.
Where sea freight is involved, vapour control provisions are quoted as part of the specification.
QUICK REFERENCE
The precision checklist.
Routed EVA or XPE with flocked facing, one cradle per instrument, finger reliefs at every lift point.
Each instrument including shafts, handles and measuring faces, plus the case internal dimensions.
Calibration tools, adaptors, stands and anything that must not be inverted.
Does the foam touch a finished or calibrated surface anywhere?
RELATED
Related information.
Materials, finishes and the inputs needed to quote an insert.
The inspection checks that apply to a precision order.
Representative builds, including a metrology kit insert.